In this exercise, you will learn how to use the Solution Explorer window’s Auto Hide feature by perform- ing the following steps:


a) Open the Start Page.
b) In the Projects tab (displayed by default), click the Open Project Button to display
the Open Project dialog. You can skip to Step e if the Welcome application is
already open.
c) In the Open Project dialog, navigate to C:\SimplyCSP\Welcome, and click Open.
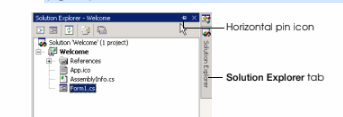
f) Click the vertical pin icon. This action causes a Solution Explorer tab to appear on
the right side of the IDE. The vertical pin icon changes to a horizontal pin icon
(Fig. 2.32). Auto Hide has now been enabled for the Solution Explorer window.
d) In the Open Project dialog, select Welcome.sln, and click Open.
e) Position the mouse pointer on the vertical pin icon in the Solution Explorer win-
dow’s title bar. After a few seconds, a tool tip appears displaying the words Auto
Hide.
You might also like to view...
The mouse technique that allows you to select one or more objects and pull it to a different location is called ________
A) mark and move B) pick and pull C) drag and drop D) select and swap
What term does PowerPoint use when referring to the comments and annotations added to a presentation?
A) Edit Notes B) Reviewer Notes C) Markings D) Markup